

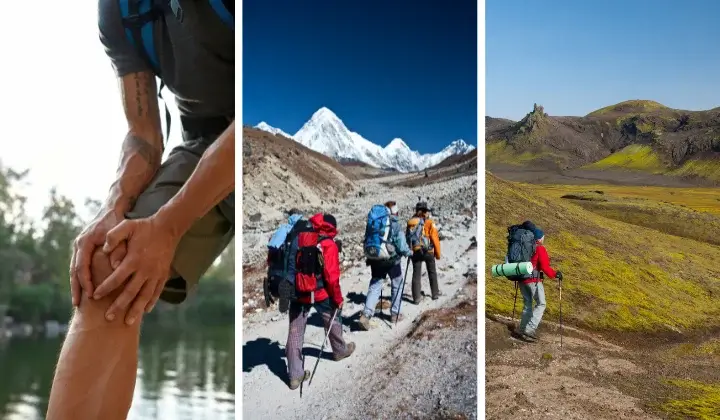
Hiking mountain trails can be a challenge that goes beyond physical endurance. Every step up or down requires extra effort, and in those moments, a detail as simple as trekking poles can make all the difference. Do they really help, or are they just another accessory?
In this blog, you’ll discover how trekking poles are used, their benefits, and why they’ve become indispensable companions on famous Cusco trails like the Inca Trail or the Salkantay Trek.
What are trekking poles?
Trekking poles are accessories designed to provide stability and support during a hike in nature. At first glance, they look similar to ordinary walking sticks, but the difference lies in their durability, their components, and the way they move with your body on uneven terrain.
A trekking pole is made up of four main parts:
- The handle, which should be comfortable and ergonomic to prevent blisters or discomfort in the hand.
- The straps, which secure the wrist to the pole and allow for better control without the need to squeeze tightly.
- The body, made of lightweight materials such as aluminum or carbon fiber, often with adjustable height.
- The tip, designed to grip the surface, be it dirt, mud, rock, or snow. Some models include rubber caps for use on asphalt as well.
Knowing how to use trekking poles correctly makes the difference between carrying a simple accessory or taking full advantage of their benefits. While they’re not mandatory on all routes, on long treks like the Inca Trail or the Salkantay Trek in Cusco, they become a great ally for saving energy and avoiding injuries.
Benefits of using trekking poles
Using trekking poles in the mountains isn’t just a fad: they truly make a difference in a hiker’s performance and safety. Furthermore, learning how to use trekking poles correctly allows you to take full advantage of all their benefits.
- They improve balance. On steep routes, Inca stairs, or rocky trails, poles help maintain stability. This is especially noticeable on demanding trails like the Wiñay Wayna descent on the Inca Trail.
- They reduce the impact on knees and joints. Every step downhill puts pressure on the knees, but with poles, much of that force is distributed to the arms. On long descents on the Salkantay Trek, for example, poles feel like a true lifesaver.
- They make ascents and descents easier. They act as extra support when climbing slopes and as a natural brake when descending. On the Choquequirao trek, where the slopes are very steep, this aid becomes almost indispensable.
- They increase endurance on long hikes. By distributing the effort between arms and legs, they allow you to walk longer distances without as much physical strain. This is key for multi-day hikes like those in Cusco.
Basic technique: how to use trekking poles
Knowing how to use trekking poles is just as important as carrying them. Incorrect technique can even make you more tired than necessary. Here are the basics to help you get the most out of them:
- On flat terrain. Ideally, use them alternately: if you move your right foot forward, the left pole moves forward, mimicking the natural movement of your arms when walking. This maintains a fluid stride.
- On climbs. Place the poles slightly forward, using them as extra momentum. This distributes the effort on your legs and helps you gain pace on the slopes. On the Inca Trail, the famous stone stairs become more bearable with this technique.
- On descents. Place the poles slightly further forward than your body, as if they were a brake support. This prevents your knees from absorbing all the pressure. On the Salkantay Trek, where descents can last several hours, this tip is essential.
Common mistakes when using trekking poles
Although they seem easy to handle, trekking poles have their tricks. Knowing how to use trekking poles correctly helps avoid discomfort and truly reap their benefits. Here are some common mistakes to avoid:
- Not adjusting the height correctly. If the pole is too long or too short, your posture becomes uncomfortable and can cause shoulder or back pain. The basic rule is to hold it on flat terrain with your elbow at a 90-degree angle.
- Putting too much weight on your arms. The pole shouldn’t carry your entire body weight; it should simply be a support that eases your walk.
- Ignoring the straps. Many beginners don’t use the straps, but they’re key for resting your hands and maintaining control. When adjusted correctly, they allow you to release the pole without it falling to the ground.
- Not adapting to the terrain. Some people use the same movement on all sections, but each surface requires a different technique. For example, on steep paths of the Choquequirao Trek, use should be more aggressive, while on flat trails, simply keeping pace is sufficient.
Types of trekking poles
The market offers several types of walking poles, and choosing the right one depends on the type of trip and personal comfort. Of course, in addition to choosing well, it’s also important to learn how to use trekking poles so they perform their function on each terrain.
- Telescopic. They can be lengthened or shortened as needed. They are versatile and adapt to different terrains. They are ideal for varied routes such as the Inca Trail, which combines flat, uphill, and downhill terrain.
- Foldable. They are lighter and take up little space, making them easy to pack in your backpack. They work very well for those who prefer to walk hands-free on some sections, such as the Salkantay Trek.
- One-piece. Although less common, they are more resistant and durable. They are recommended for treks with steep inclines, such as the Choquequirao, where the terrain can be more demanding.
The choice depends on your plans: if you’re doing a short day hike, you might not need the most sophisticated equipment, but for long, multi-day treks in Cusco, it’s worth investing in a good pair of walking sticks.
Frequently asked questions:
How do I choose the correct trekking pole height for my height?
The height should be adjusted so that the arm forms a 90° angle on flat terrain. This avoids overtaxing the joints.
Is it necessary to always use two poles, or can I walk with just one?
Ideally, both are used, as they distribute the effort better, although on narrow trails, many prefer to walk with just one.
How do I adjust the pole straps for comfort and safety?
The strap should fit the wrist without being too tight. This allows for less force on the hands and prevents fatigue on long hikes.
Should trekking poles be used on flat terrain or only in the mountains?
They are also useful on flat terrain, as they help maintain pace and reduce wear on long hikes like the Inca Trail.
Which tips are best: metal, rubber, or with special attachments?
Metal ones work best on dirt and rock, rubber ones on hard or cobblestone surfaces, and special ones are good for snow or sand.
How do I store or transport my poles when I’m not using them on the trail?
If they’re collapsible, they fit easily into my backpack. On trails like Choquequirao, where the path can be narrow, this is a huge advantage.
What’s the difference between telescopic and collapsible poles in practice?
Telescopic poles are more durable and easier to adjust, while collapsible poles weigh less and take up less space.
Can trekking poles be used on short hikes or only on long treks?
They’re useful for both. Even on short hikes like the climb to Huayna Picchu, they provide stability on steep stair sections.
Are trekking poles suitable for all types of weather, even in rain or snow?
Yes, as long as they are fitted with the correct tips. On trails like the Salkantay Trek, they’re very helpful in wet or snowy areas.
How often should I check or change the tips and accessories on my poles?
It depends on usage, but it’s recommended to check them before each trip. On demanding routes like Ausangate, having tips in good condition is key.